

Making your own Homemade Gummies Recipe is one of the most cheerful kitchen projects you can tackle, transforming simple fruit juice into wiggly, joyful candies. This American confectionery classic gets a wholesome makeover when you craft it in your own kitchen, allowing you to dial in the perfect sweetness and experiment with endless flavors. I love how this process demystifies candy-making and puts you in total control of what goes into your treats. It’s a surprisingly simple method that yields impressive results, perfect for gifting or keeping all to yourself.
Why You'll Love This Recipe
- You know exactly what’s in every single bite
- Customize the colors and flavors to whatever you’re craving
- It’s a fraction of the cost of the fancy store-bought bags
- Kids absolutely adore helping with the pouring and tasting
- My candy drawer has never been happier
Ingredients You’ll Need
- 100% fruit juice: The star flavor builder, pick a bold juice like pomegranate or cherry for vibrant taste and color, avoiding blends with added sugar.
- Cold water: This hydrates the gelatin to bloom properly, always use cold to prevent clumping and ensure a smooth texture later.
- Unflavored gelatin powder: This is what gives the gummies their signature bounce and structure, look for a high-quality brand for the best set.
- Granulated sugar: It sweetens and balances the tartness, creating that classic candy flavor you expect from a good gummy.
- Light corn syrup: A little bit prevents crystallization and adds a desirable chewiness, giving the texture a professional finish.
- Fresh lemon juice: The essential acid brightens all the other flavors and helps balance the sweetness so the gummies aren’t cloying.
- Vanilla extract: An optional but wonderful background note that rounds out fruit flavors beautifully, especially with berry or tropical juices.
- Citric acid: This is the secret to that addictive tart-sweet punch, it makes the flavors pop just like the best sour candies.
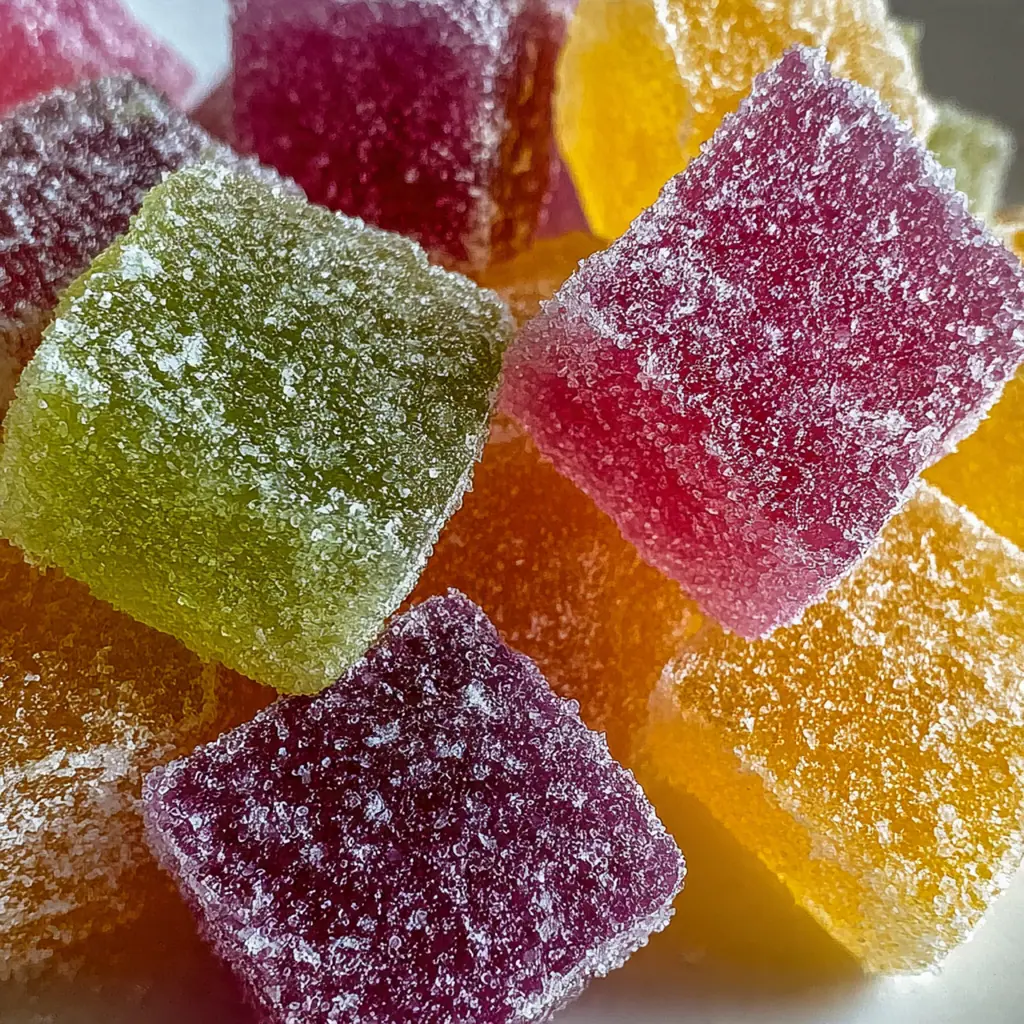
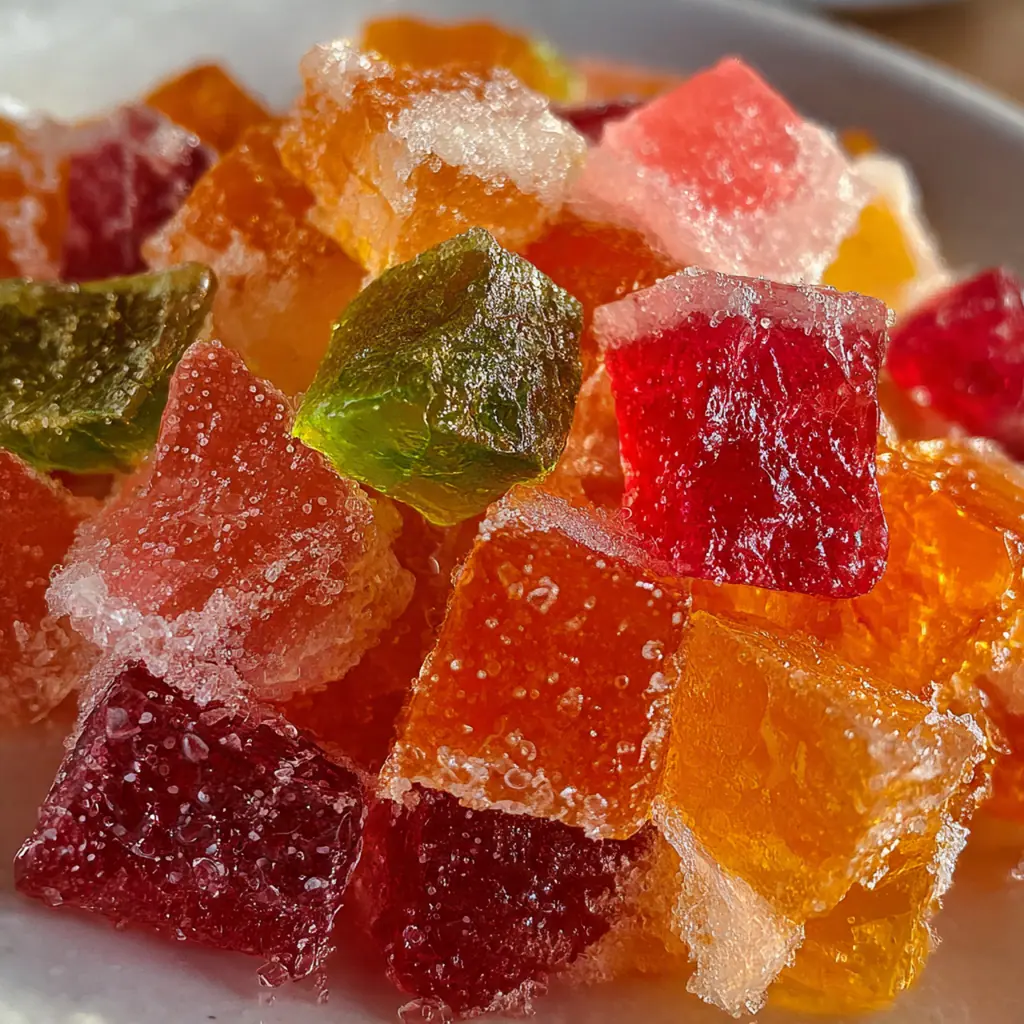
- Natural food coloring: Purely for visual fun, a drop or two of gel or liquid color makes them look as good as they taste.
- Cooking spray or coconut oil: A light coating ensures your gummies pop right out of their molds without any tearing or sticking.
- Powdered sugar or extra citric acid: These finishing touches let you customize each batch, from a sweet dusting to a lip-puckering sour coat.
How to Make It
Prepare Your Molds:
Start by lightly greasing every cavity of your gummy molds with a thin film of cooking spray or coconut oil. Placing them on a baking sheet gives you a stable tray to carry to the fridge later. This little step is the key to perfect, unmangled gummy release.
Bloom the Gelatin:
Sprinkle your gelatin powder evenly over the cold water in a small bowl and just let it sit. Don’t stir it yet. In about five minutes, it will transform into a thick, spongy mass which means it’s ready to melt smoothly.
Dissolve the Sugar Base:
Combine your fruit juice, sugar, corn syrup, and lemon juice in a saucepan over medium heat. Stir this constantly until every grain of sugar has melted and the mixture is just warm to the touch. You never want it to come to a boil at this stage.
Melt in the Gelatin:
Turn the heat down to its lowest setting. Whisk your bloomed gelatin into the warm juice mixture until it dissolves completely, which should take two to three minutes of steady stirring. You’re aiming for a perfectly smooth, lump-free liquid.
Finish the Flavor:
Take the pan off the heat immediately. This is when you stir in your vanilla, citric acid, and any food coloring if you’re using it. Mix until everything is fully and evenly incorporated into the syrup.
Fill the Molds:
Working quickly but carefully, use a small measuring cup with a spout or a kitchen dropper to transfer the liquid into your prepared molds. Gently tap the whole tray on the counter a few times to dislodge any pesky air bubbles trapped underneath.
Chill Until Set:
Carefully transfer the baking sheet with the filled molds to your refrigerator. Let them chill undisturbed for a minimum of two hours, though I often leave mine overnight for absolute firmness.
Unmold and Finish:
Once they’re completely firm, simply push each gummy out from the back of the mold. Now you can roll them in a little extra citric acid or sugar for a fun coating, or just enjoy them plain.
Store for Later:
Pop your finished homemade gummies into an airtight container. They’ll keep beautifully in the fridge for up to two weeks, ready for whenever a sweet craving strikes.

You Must Know
- Blooming gelatin in cold water is non-negotiable for smooth results
- Never let the mixture boil after adding the gelatin
- Citric acid is the magic behind that tangy sour candy flavor
- A dropper is your best friend for filling tiny molds without a mess
- I always make a double batch because they disappear fast
Storage Tips
Store your homemade gummies in a single layer or with parchment paper between layers inside an airtight container in the refrigerator, where they’ll stay perfectly chewy and fresh for up to two weeks. If you want to keep them longer, you can freeze them on a parchment-lined sheet before transferring to a freezer bag, and they’ll be good for about three months; just thaw them in the fridge overnight before you dig in. They can get a little sticky at room temperature, so I always keep them chilled until right before serving or packing them up.
Ingredient Substitutions
If you’re looking for a vegan option, swap the gelatin for about two tablespoons of agar-agar powder, but be prepared to follow its specific instructions as it requires a brief boil and sets much firmer and faster. You can replace the light corn syrup with honey or maple syrup for a different flavor profile, though the texture might be slightly less chewy and the gummies could be stickier. Any clear fruit juice or even herbal tea works wonderfully as the liquid base, and if you don’t have citric acid, a tiny extra squeeze of fresh lemon juice can provide a bit of that tang, though it won’t be quite as potent.
Serving Suggestions
I love packing these gummies in lunchboxes for a sweet surprise, or arranging a rainbow assortment on a platter for parties next to a bowl of nuts and fresh fruit slices. They’re fantastic as a light dessert after a picnic spread or simply kept in a jar on the counter for a quick treat with your afternoon coffee. For a really special touch, place a few in a small cellophane bag tied with ribbon – it makes the most charming and personal little gift anyone could receive.
Cultural Context
While gummy candies have their roots in early 20th-century German gelatin treats, the concept of making sweet, fruit-juice-based jellies at home is a timeless tradition across many cultures, from Turkish delight to Japanese konnyaku. This particular homemade gummies recipe taps into the modern American DIY movement, emphasizing control over ingredients and customization, which is a direct response to the processed foods that dominated pantry shelves for decades. It’s a fun, accessible way to reconnect with the simple pleasure of creating confectionery magic in your own kitchen, one playful mold at a time.
Pro Tips
- For crystal-clear gummies, strain your juice or use a clarified variety
- No molds? Use a parchment-lined baking dish and cut squares
- A squeeze bottle gives you pinpoint control for filling shapes
- Let the mixture cool just a minute before pouring to avoid warping plastic molds
- My favorite combo is tart cherry juice with a vanilla finish
Frequently Asked Questions
For the best flavor and set, use 100% fruit juice without pulp, like apple or orange juice. These juices have a balanced flavor and acidity that pairs well with the gelatin. Avoid juices with added sugar, as the recipe already includes granulated sugar and corn syrup for sweetness and texture.
Absolutely! These gummies are perfect for making ahead. Once set, store them in an airtight container at room temperature for up to a week. For longer storage, you can keep them refrigerated for up to two weeks, ensuring they stay fresh and chewy.
If you prefer to avoid corn syrup, you can substitute it with honey or agave nectar for a similar texture and sweetness. Keep in mind that honey will impart its own distinct flavor. For a completely clear set, you can also use an additional 1/4 cup of granulated sugar, though the texture may be slightly less chewy.
The gummies are ready when they are completely firm to the touch and pull away easily from the sides of the mold. This typically takes 2-4 hours at room temperature. For the best results, let them set overnight to ensure they are fully firm and have the perfect, jiggly consistency.
These homemade gummies are a delightful American snack on their own. For a fun treat platter, serve them alongside other easy snacks like popcorn, fresh fruit, or cheese cubes. They’re also perfect packed in lunchboxes or presented in a jar as a sweet, thoughtful gift.