

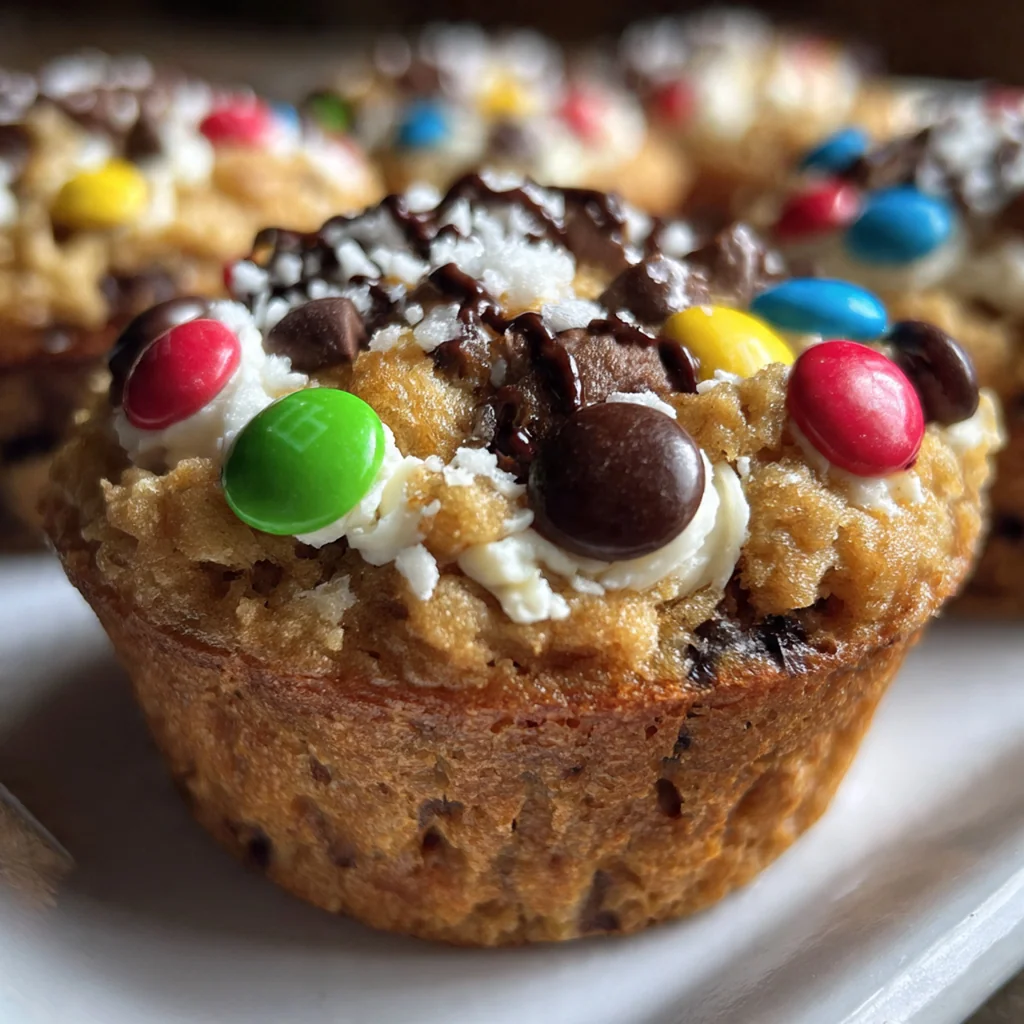
Monster Cookie Dough Cupcakes are the ultimate dessert for anyone who believes cookie dough is the best part of the whole baking process. These over-the-top treats combine the classic flavors of peanut butter, oats, chocolate, and candy into a fun, handheld dessert that’s guaranteed to impress. This American creation takes everything you love about monster cookies and bakes it right into a moist cupcake with a surprise center. I’ve been making them for birthdays and bake sales for years, and they’re always the first to disappear from the table.
Why You'll Love This Recipe
- Every bite is packed with classic monster cookie flavor from peanut butter to M&M’s
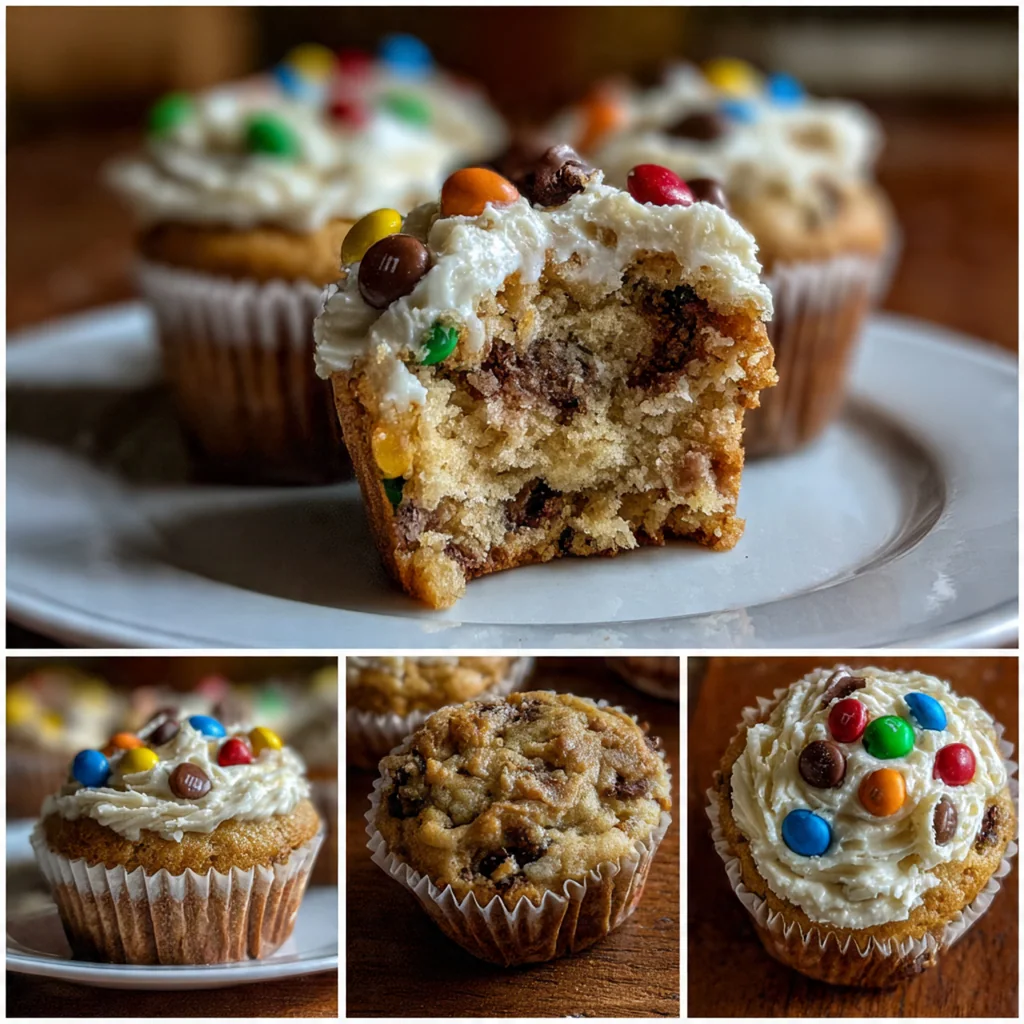
- The edible cookie dough center is safe to eat and stays wonderfully soft and gooey
- The fluffy peanut butter frosting is rich and creamy, and the perfect final layer
- They’re impressive and detailed but totally approachable for a baker of any skill level
- Honestly, they’re the most fun you can have with a cupcake liner
Ingredients You’ll Need
- Unsalted butter (softened): It’s crucial for a creamy texture in both the dough and batter I always use unsalted to control the salt level in my baking.
- Creamy peanut butter: This is your main flavor star and it needs to be creamy for proper mixing I prefer a standard commercial brand for consistent texture.
- Light brown sugar: Its molasses content adds moisture and that classic, deep caramel note which balances the sweetness.
- Granulated sugar: This provides the straightforward sweetness that granulated sugar is known for and helps create structure.
- Milk: It adds necessary moisture to bring the components together you can use any kind you have on hand.
- Pure vanilla extract: A splash of vanilla rounds out all the sweet flavors and adds a warm bakery aroma.
- All-purpose flour (heat-treated): This is the safety step for edible dough you must heat-treat it to eliminate any bacteria.
- Fine sea salt: It enhances every single flavor and cuts through the sweetness for a more balanced treat.
- Old-fashioned rolled oats: They give that signature monster cookie chew and a lovely textural contrast inside the soft dough.
- Semi-sweet chocolate chips: They offer rich, melty pockets of chocolate flavor I like the classic semi-sweet balance.
- M&M’s: They add pops of color and a candy-coated crunch that’s iconic to monster cookies.
- Baking powder & baking soda: These are your leavening agents that give the cupcakes their lift and tender crumb.
- Large eggs (room temp): They bind the batter and add structure letting them warm up prevents a dense cupcake.
- Powdered sugar (sifted): This creates the smooth, fluffy base for your frosting sifting is non-negotiable for no lumps.
- Heavy cream or milk: You’ll add this to the frosting to achieve the perfect spreadable and pipeable consistency.
How to Make It
Craft the Edible Cookie Dough:
Start by making your safe-to-eat dough. In a medium bowl, beat together the butter, peanut butter, and both sugars until it’s completely smooth and creamy, which should take about two minutes. Then, beat in the milk and vanilla extract. Stir in your heat-treated flour and salt just until they disappear into the mixture. Finally, fold in the oats, chocolate chips, and M&M’s, cover the bowl, and pop it in the fridge to firm up while you work on the batter.
Prepare Your Oven and Pan:
While your dough chills, turn your oven on to 350°F and line a standard muffin tin with paper liners. Giving your oven time to preheat fully ensures your cupcakes bake evenly from the moment they go in.
Combine the Dry Cupcake Ingredients:
In a separate bowl, whisk together the flour, baking powder, baking soda, and salt. Doing this first means the leavening agents are evenly distributed throughout the flour, which prevents any dense or uneven spots in your finished cupcakes.
Mix the Wet Cupcake Batter:
In a large bowl, beat the butter and peanut butter together until they’re one smooth mixture. Add the brown sugar and beat it on a higher speed until the whole thing looks light and fluffy, which takes another couple of minutes. Beat in the eggs one at a time, letting each fully incorporate before adding the next, and then mix in the vanilla.
Finish and Fill the Cupcake Cups:
With your mixer on its lowest speed, add your dry ingredients in three parts, alternating with the milk. You want to start and end with the dry ingredients, and mix only until you stop seeing streaks of flour. Scoop the batter into your liners, filling each one only halfway. Take the chilled dough, roll it into twelve even balls, and gently press one into the center of each cup of batter.
Bake and Cool Completely:
Bake for 18 to 22 minutes. You’ll know they’re done when the cakey edges are set and a toothpick poked into that edge (not the dough center) comes out clean. Let them cool in the pan for ten minutes before moving them to a wire rack they must be completely cool before you frost them.
Whip Up the Peanut Butter Frosting:
While the cupcakes cool, make your frosting. Beat the butter and peanut butter together until they’re incredibly smooth and creamy, which takes about three minutes. Gradually add the sifted powdered sugar with the mixer on low, then crank it up to high and beat for two full minutes to make it fluffy. Add the vanilla and two tablespoons of cream, beat again, and adjust with more cream or sugar until it’s perfectly spreadable.
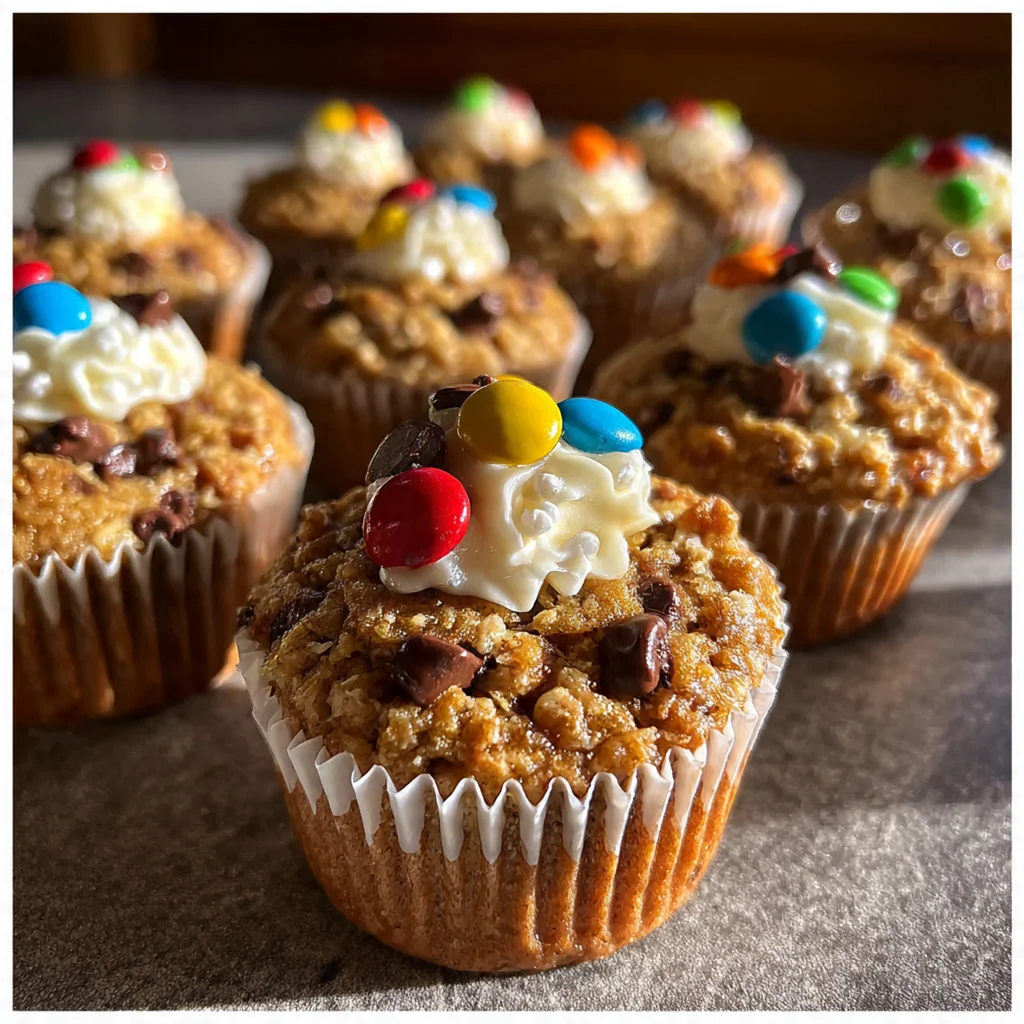
Frost and Garnish Your Cupcakes:
Once the cupcakes are cool, pile that fluffy frosting on top using a piping bag or an offset spatula. Immediately sprinkle on your extra M&M’s, chocolate chips, or mini peanut butter cups so they stick before the frosting sets. Let them sit for about fifteen minutes so the frosting can firm up a bit, then they’re ready to serve.
You Must Know
- You must heat-treat the flour for the cookie dough to make it safe to eat
- Room temperature ingredients are non-negotiable for smooth batter and frosting
- Do not overmix the cupcake batter after adding the dry ingredients
- The cookie dough center should be mostly submerged but not touch the liner bottom
- Let the cupcakes cool completely before frosting or it’ll just melt right off
Storage Tips
You can store these frosted monster cookie dough cupcakes in an airtight container at room temperature for a couple of days, though I think they’re best on day one. For longer storage, pop them in the fridge for up to five days, but let them sit out for about thirty minutes before serving so the frosting softens up nicely. If you want to get ahead, you can freeze the unfrosted cupcakes for up to two months just wrap them tightly in plastic and then foil.
Ingredient Substitutions
If you’re out of heavy cream for the frosting, regular milk works just fine, though the frosting won’t be quite as rich. For a different flavor twist, you could swap the semi-sweet chocolate chips for milk or dark chocolate chips in the dough. In a pinch, quick oats can stand in for the old-fashioned rolled oats, though the texture will be a bit less pronounced. If you need a nut-free version, sunflower seed butter is a great swap for the peanut butter, but know it will tint your batter and frosting a greenish hue over time.
Serving Suggestions
I always serve these cupcakes with an ice-cold glass of milk on the side it’s the classic pairing for a reason. For a real indulgence, try placing a mini scoop of vanilla ice cream right on top of the frosted cupcake just before serving. They’re perfect for a birthday party dessert table or as the star of a weekend baking project with kids who love to sneak the M&M’s. You could even crumble one over a bowl of vanilla ice cream for the ultimate sundae situation.
Cultural Context
This recipe is a playful, over-the-top take on classic American bakery treats, where more is often more. It draws direct inspiration from the beloved monster cookie, a no-holds-barred cookie that originated in the Midwest and famously includes oats, peanut butter, and M&M’s all in one dough. The trend of stuffing edible cookie dough into other desserts, like cupcakes, speaks to a broader cultural nostalgia for that forbidden taste of raw batter from the mixing bowl. It’s a celebration of fun, indulgence, and the joy of baking something that’s meant to put a huge smile on your face.
Pro Tips
- Heat-treat flour by baking it spread out on a sheet at 350°F for 5-7 minutes
- If the dough is too soft after chilling, a quick 10 minutes in the freezer fixes it
- Use a piping bag with a large star tip for beautiful, professional-looking frosting swirls
- For intense peanut butter flavor in the frosting, use a natural, no-stir variety
- I always roll my dough balls with slightly damp hands to prevent sticking
Frequently Asked Questions
The recipe calls for heat-treating the all-purpose flour before using it in the edible cookie dough filling. This process eliminates any potential bacteria, making the dough safe to consume raw. Simply spread the flour on a baking sheet and bake at 350°F for about 5 minutes, then let it cool completely before using.
Yes, you can bake the cupcakes and prepare the frosting a day in advance. Store the unfrosted cupcakes in an airtight container at room temperature. Keep the frosting covered in the refrigerator, then let it come to room temperature and re-whip before piping. For best texture, stuff with the edible dough and decorate the day you plan to serve them.
If you have a peanut allergy or preference, you can use an equal amount of almond butter, sunflower seed butter, or cookie butter (biscoff spread) as a 1:1 substitute for the peanut butter in the cupcake batter, dough, and frosting. The flavor will change, but the texture and structure will remain similar.
The cupcakes are done when a toothpick inserted into the cupcake portion (not the dough center) comes out clean or with a few moist crumbs, about 18-22 minutes. The tops will be lightly golden and spring back when gently pressed. Be careful not to overbake, as the peanut butter can dry out.
These rich, decadent cupcakes are a complete dessert on their own! For an American dessert spread, pair them with a cold glass of milk, a scoop of vanilla ice cream, or a cup of coffee to balance the sweetness. They’re perfect for birthdays, bake sales, or any celebration where a show-stopping treat is needed.