

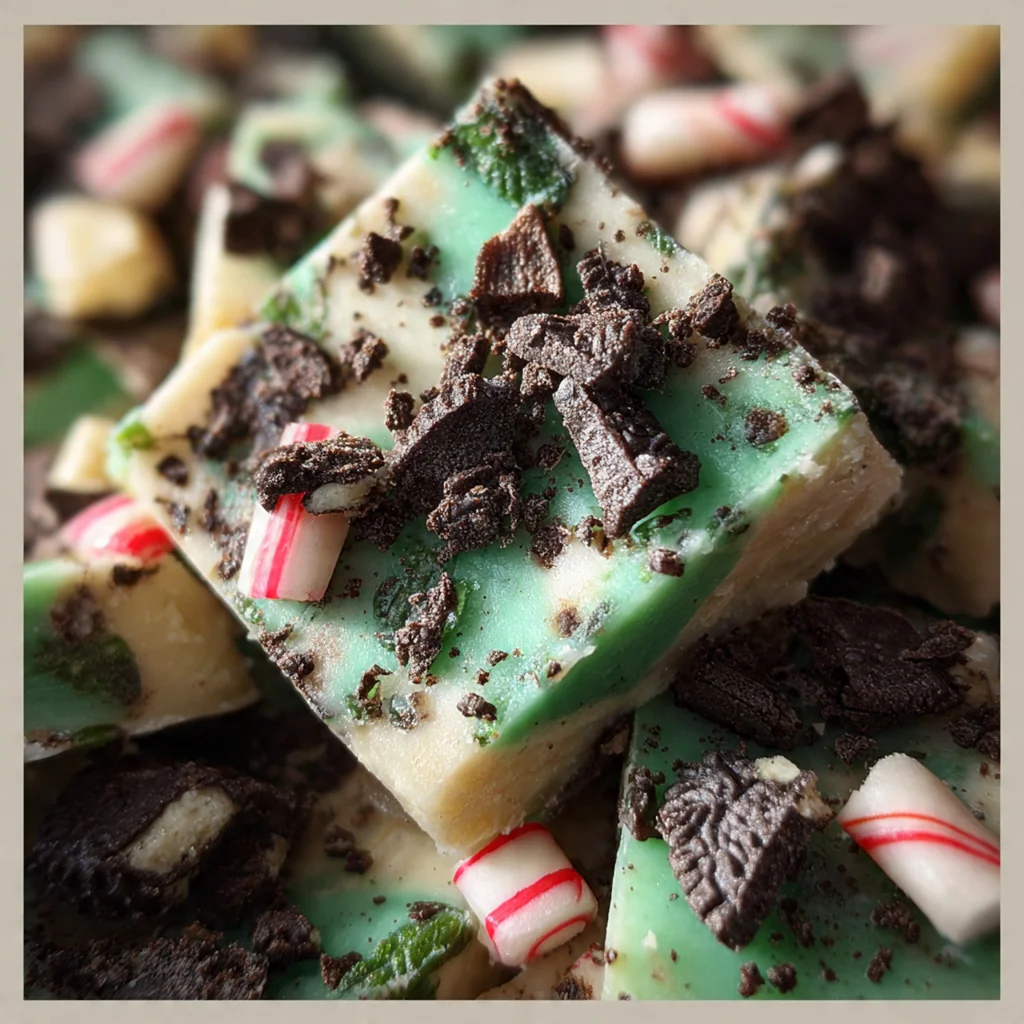
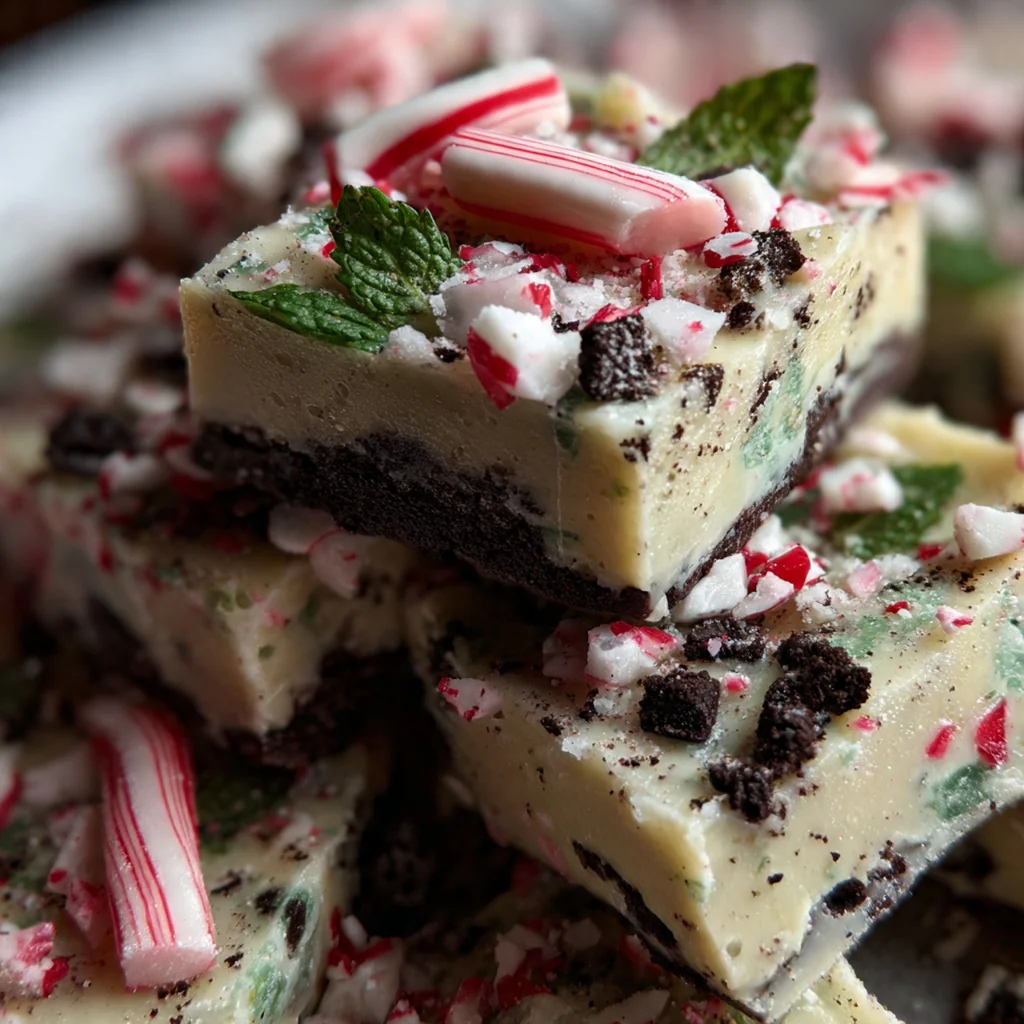
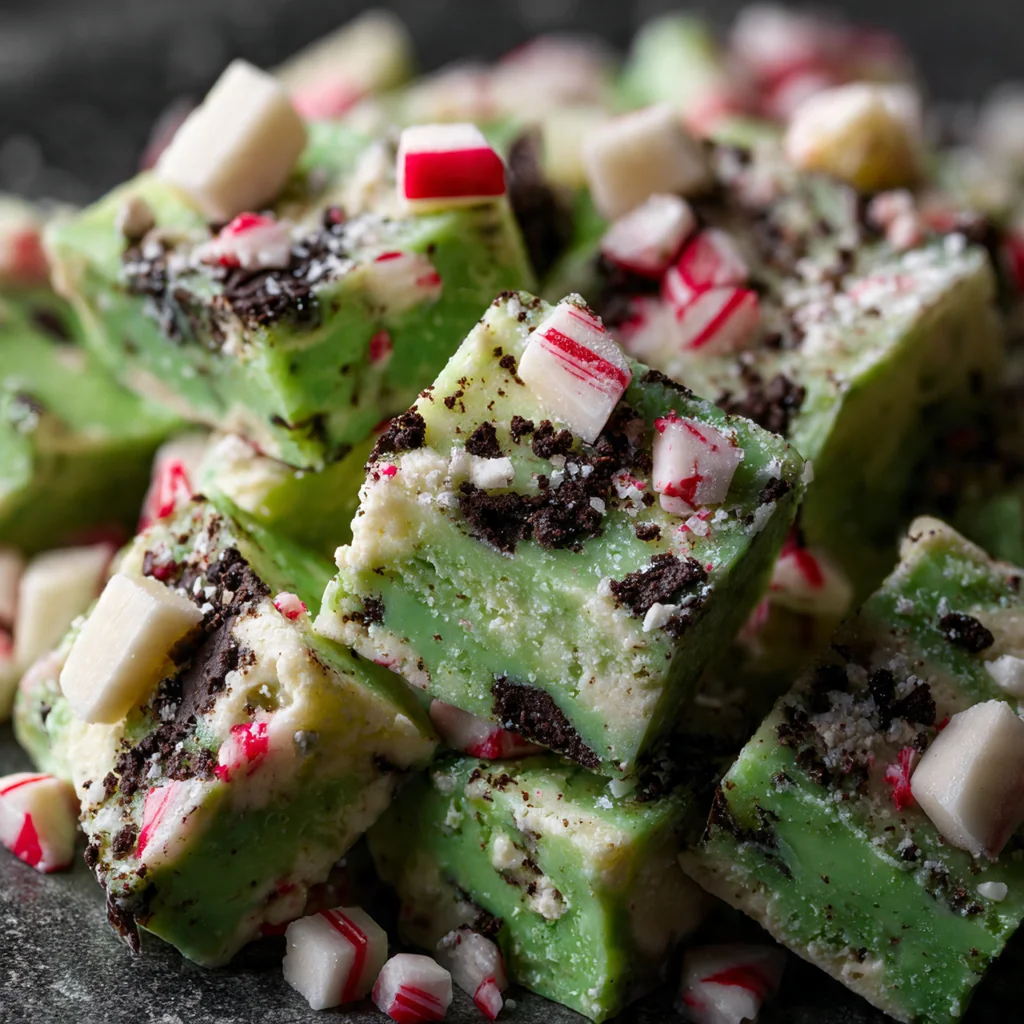
This easy Christmas Mint Oreo Fudge is the ultimate no-bake holiday treat that I make every single year because it’s always the first to vanish from the dessert table. It perfectly captures the festive spirit with its creamy white chocolate base, refreshing mint flavor, and the fantastic crunch of crushed Oreos. As an American holiday staple, it’s incredibly simple to whip up with just a few ingredients and about ten minutes of hands-on time. You’ll love how the cool peppermint pairs with the rich sweetness for a truly irresistible homemade gift or party centerpiece.
Why You'll Love This Recipe
- It requires only 10 minutes of active work with no oven time at all
- The classic white chocolate and mint combo feels just like the holidays in every bite
- The crushed Oreo pieces give you a wonderful texture surprise
- It’s a total crowd-pleaser that looks amazing on any cookie platter
- My friends ask me to bring it to every single gathering
Ingredients You’ll Need
- White chocolate chips: Go for a high-quality brand for the smoothest melt and best flavor because cheaper chips can sometimes seize up and become grainy when melted.
- Sweetened condensed milk: This is the magic ingredient that gives the fudge its ultra-creamy texture and helps it set up perfectly without any fuss.
- Unsalted butter: Cubed butter melts evenly into the base for a rich, velvety mouthfeel and helps balance the overall sweetness.
- Fine sea salt: A tiny bit enhances all the other flavors and cuts through the sweetness, making the mint and chocolate really pop.
- Pure peppermint extract: This is key for that clean, refreshing minty kick; avoid mint extract which can sometimes have a medicinal taste.
- Green gel food coloring: Just a drop or two gives that festive holiday look without thinning out your fudge mixture like liquid food coloring might.
- Mint Oreo Cookies: They provide the iconic crunch and a double dose of mint flavor; you’ll use most in the batter and save a few for topping.
- Crushed candy canes or peppermint candies: These add a festive pop of color and extra peppermint crunch on top for a beautiful presentation.
- Semi-sweet chocolate chips for drizzling: An optional drizzle creates a lovely visual contrast and adds a hint of dark chocolate flavor.
- Festive holiday sprinkles: A quick sprinkle on top makes each batch unique and extra cheerful for your holiday table.
How to Make It
Prepare Your Baking Pan:
Start by lining an 8×8-inch pan with parchment paper, letting the edges hang over the sides. This creates handy handles that make lifting the whole fudge block out later an absolute breeze. Trust me, you don’t want to skip this step.
Crush the Oreos:
Set aside five or six whole cookies for decorating later. Take the rest of the package and place them in a large zip-top bag. Use a rolling pin to crush them until you have a mix of fine crumbs and satisfying larger chunks, then set the bag aside.
Melt the Fudge Base:
Combine your white chocolate chips, sweetened condensed milk, cubed butter, and salt in a medium, heavy-bottomed saucepan. Cook this over low heat, stirring constantly with a silicone spatula, until everything is completely melted and smooth. This should take about four to five minutes and you must keep the heat low to prevent scorching.
Incorporate Flavor and Color:
Take the pan off the heat immediately once it’s smooth. Stir in the peppermint extract and your optional green food coloring until the color is even throughout. The aroma at this point is just incredible.
Fold in the Cookies:
Gently fold the crushed Oreo mixture from the bag into the warm fudge base. You want to make sure every single cookie piece gets coated, but try not to over-mix and crush them further.
Press into the Pan:
Pour the thick fudge mixture into your prepared pan. Use your spatula to spread it into a perfectly even layer, pressing it gently into all four corners. It will be quite thick, so just take your time.
Add the Toppings:
Break your reserved whole cookies into halves or quarters. Press them decoratively into the top of the fudge along with any crushed candy canes or festive sprinkles you’re using. This is where you get creative.
Optional Drizzle and Chill:
If you’re adding a chocolate drizzle, melt the semi-sweet chips in short bursts in the microwave. Drizzle the melted chocolate over the top with a fork. Let the pan cool on the counter for 15 minutes, then cover it and refrigerate for at least two hours until it’s completely firm.
Slice and Serve:
Use the parchment paper handles to lift the entire fudge block onto a cutting board. For picture-perfect squares, use a sharp knife to cut it into one-inch pieces, wiping the blade clean with a warm, damp cloth between each cut.
You Must Know
- Pure peppermint extract is non-negotiable for the best flavor
- Stir constantly over low heat to keep the white chocolate smooth
- Let it chill fully for clean, easy cuts
- It’s the easiest homemade gift you’ll ever make
Storage Tips
Once your Christmas Mint Oreo Fudge is fully set, store the squares in an airtight container in the refrigerator where they’ll stay perfect for up to two full weeks. If you want to make it way ahead, you can freeze the fudge for up to three months; just place the squares in a single layer on a parchment-lined tray to freeze solid, then transfer them to a freezer-safe container with parchment between the layers so they don’t stick together. Thaw it overnight in the fridge before serving, and the texture will be just as creamy as the day you made it.
Ingredient Substitutions
If you can’t find pure peppermint extract, you could use a teaspoon of peppermint oil, but be very cautious as it’s much more potent. For a gluten-free version, simply swap the regular Mint Oreos for your favorite gluten-free chocolate sandwich cookies and use a mint extract to get that flavor. You can skip the green food coloring entirely for a classic white fudge look, or use red coloring for a different festive vibe. Any leftover peppermint candies or even Andes mints crushed up work beautifully in place of the candy cane garnish, and if you’re out of white chocolate chips, vanilla almond bark or white candy coating will work in a pinch.
Serving Suggestions
Arrange your Christmas Mint Oreo Fudge squares on a festive platter alongside other holiday cookies like gingerbread men and shortbread for a stunning dessert spread that always impresses. I love serving it with a steaming mug of rich hot cocoa or a strong cup of coffee to balance the sweetness. It also makes a wonderful homemade gift when you stack the squares in a decorative holiday tin or a clear cellophane bag tied with a ribbon; it’s a present people genuinely get excited to receive.
Cultural Context
Fudge has deep roots in American culinary history, often appearing at holidays, county fairs, and as a cherished homemade gift. This particular version, bursting with mint and Oreos, is a modern twist on that classic tradition, reflecting our love for mash-up desserts and convenient, no-bake treats. The combination of mint and chocolate has long been associated with winter celebrations, evoking the cool, refreshing flavors of the season. Making a batch of this fudge to share continues that lovely custom of creating edible gifts from the kitchen, a practice that feels especially meaningful during the holiday rush.
Pro Tips
- Chill the whole fudge block for 30 minutes after scoring your cut lines with a knife
- Gel food coloring gives vibrant color without changing the texture
- Let it come to room temp for 10 minutes before serving for the best bite
- I always make a double batch because one is never enough
Frequently Asked Questions
For authentic flavor, use pure peppermint extract, not mint extract. Peppermint extract provides a clean, cool mint taste that complements the sweet white chocolate and Oreos perfectly. Mint extract can sometimes have a sharper, almost medicinal flavor that may overwhelm the other ingredients in this Christmas Mint Oreo Fudge.
Absolutely! This fudge is an excellent make-ahead dessert. It needs at least 4 hours to set, but for best results and cleanest slicing, let it set overnight in the refrigerator. Once set, store it in an airtight container in the fridge for up to 2 weeks, making it perfect for holiday prep.
Sweetened condensed milk is essential for the creamy, firm-set texture of this fudge. There isn’t a direct one-to-one substitute for it in this recipe. Using alternatives like evaporated milk or regular milk will result in a mixture that doesn’t set properly. Stick with the canned sweetened condensed milk for the signature rich and sliceable Christmas Mint Oreo Fudge.
The fudge mixture is ready when the white chocolate chips are completely melted and the mixture is smooth after about 5 minutes of cooking over low heat. You should stir constantly until it forms a uniform, glossy base. Once you pour it into the pan and garnish, it’s ready to chill. It’s fully set when it’s firm to the touch and easily cuts into clean squares.
This rich fudge is a standout on its own, but it pairs beautifully with other American holiday desserts on a festive platter. Try it alongside chocolate peppermint bark, sugar cookies, or a glass of cold milk or hot cocoa. For a holiday party, it’s perfect with coffee, eggnog, or as part of a grand dessert table featuring various Christmas cookies and candies.