

Christmas cake pops are the festive, handheld treat that can turn any holiday gathering into something special. They capture that familiar, warmly spiced cake flavor we all crave, paired with a smooth white candy coating and endless decorating possibilities. As an American holiday staple, these little bites are all about creativity and sharing joy. I love making them because they’re a project that feels fancy but is totally approachable for any home baker looking to spread some cheer.
Why You'll Love This Recipe
- They’re a fun, creative project perfect for holiday parties and kids
- That spiced cake with a hint of orange zest is pure Christmas in every bite
- You’ll love how impressive they look for how simple they are to assemble
- They make the most adorable and personal edible gifts
- My family now expects a batch every single year
Ingredients You’ll Need
- All-purpose flour: provides the sturdy yet tender structure needed to hold the cake pops together look for a reliable brand you trust for consistent results.
- Baking powder and baking soda: these leavening agents work together to give the cake a perfect lift and light crumb texture.
- Salt: enhances all the other flavors in the cake and balances the sweetness don’t skip it.
- Ground cinnamon, ginger, and nutmeg: this classic holiday spice trio creates that warm comforting flavor we associate with the season use fresh spices for the best aroma.
- Unsalted butter softened: gives the cake richness and moisture letting it come to room temperature is key for proper creaming.
- Granulated sugar: sweetens the cake and helps create a light texture when beaten with the butter.
- Large eggs: bind the batter and add structure and moisture bring them to room temperature too.
- Vanilla extract: adds a layer of sweet aromatic flavor that complements the spices perfectly.
- Orange zest: the secret ingredient a bright citrus note cuts through the sweetness and makes the spices sing.
- Milk: adds necessary liquid for a batter that’s easy to mix and bakes up moist.
- Cream cheese softened: this is what binds the cake crumbs into a pliable dough and adds a subtle tang.
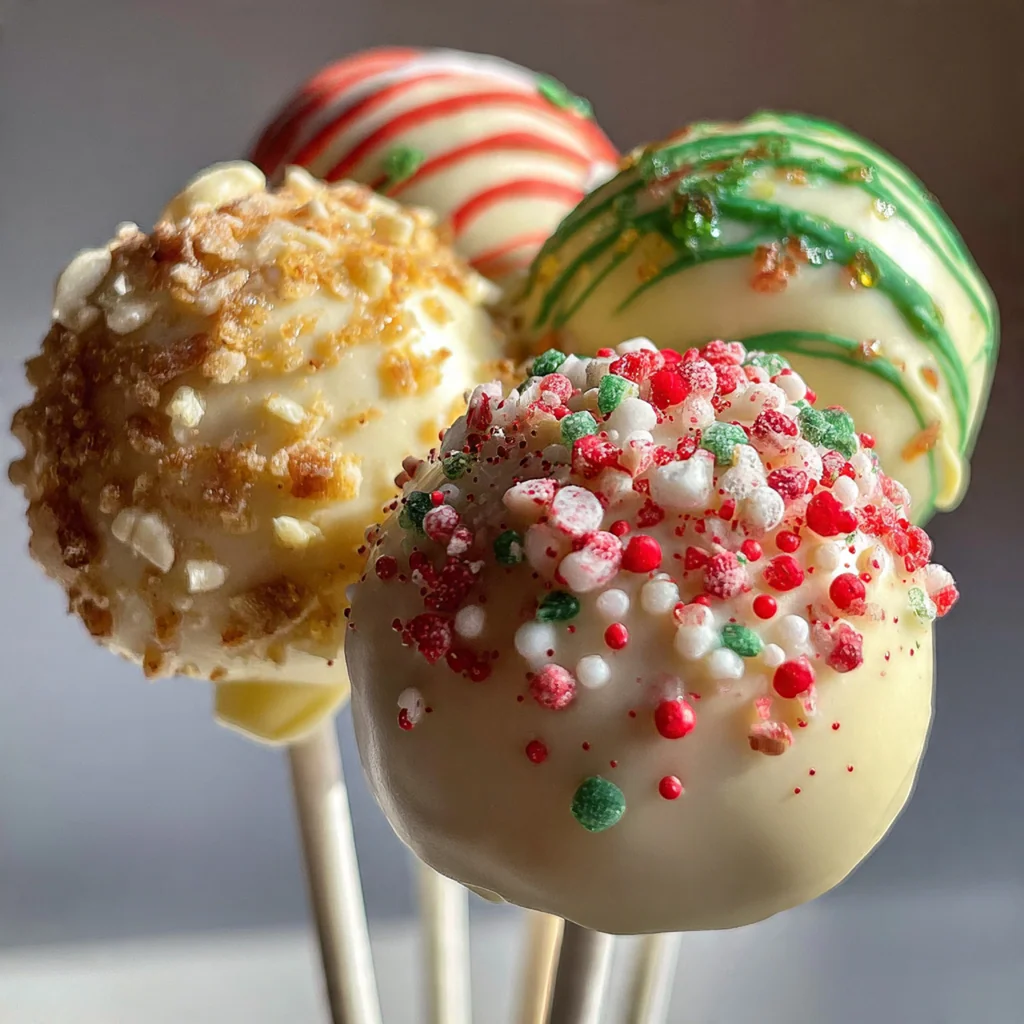
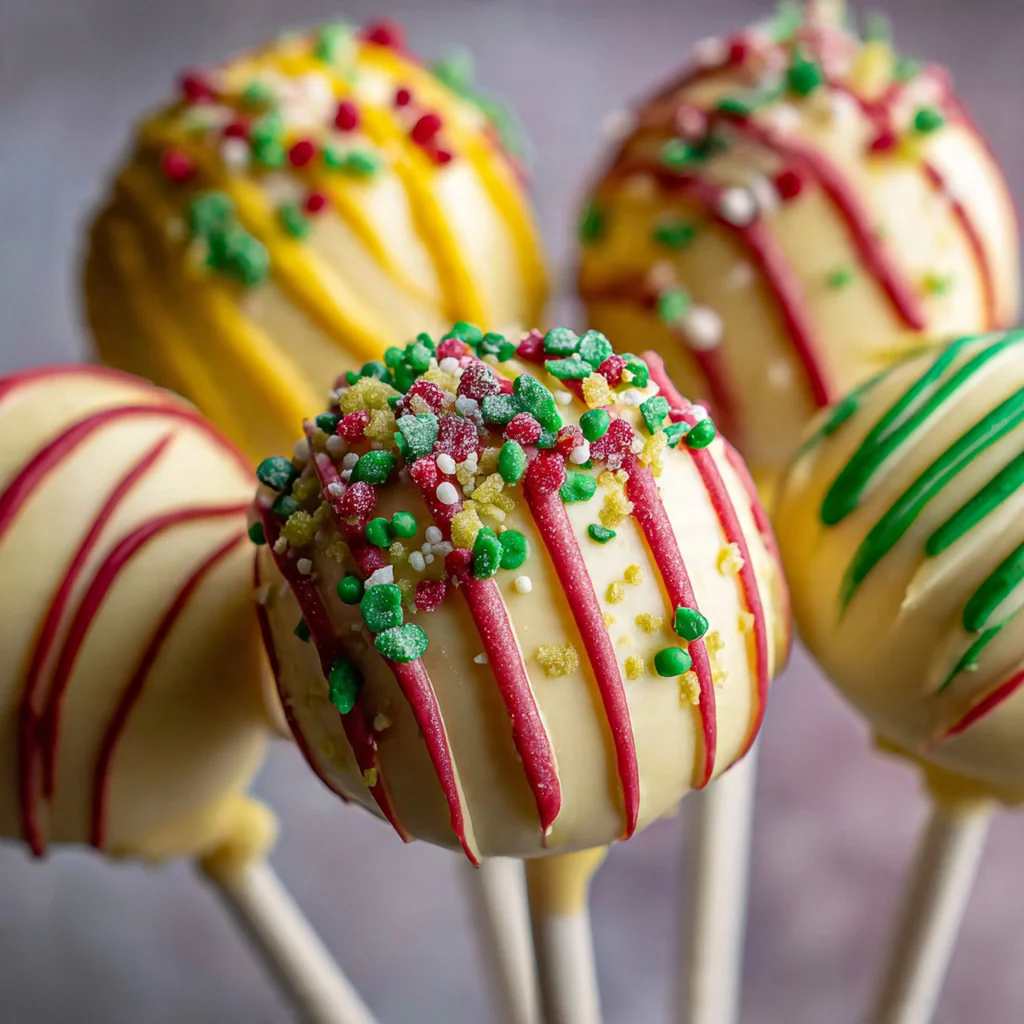
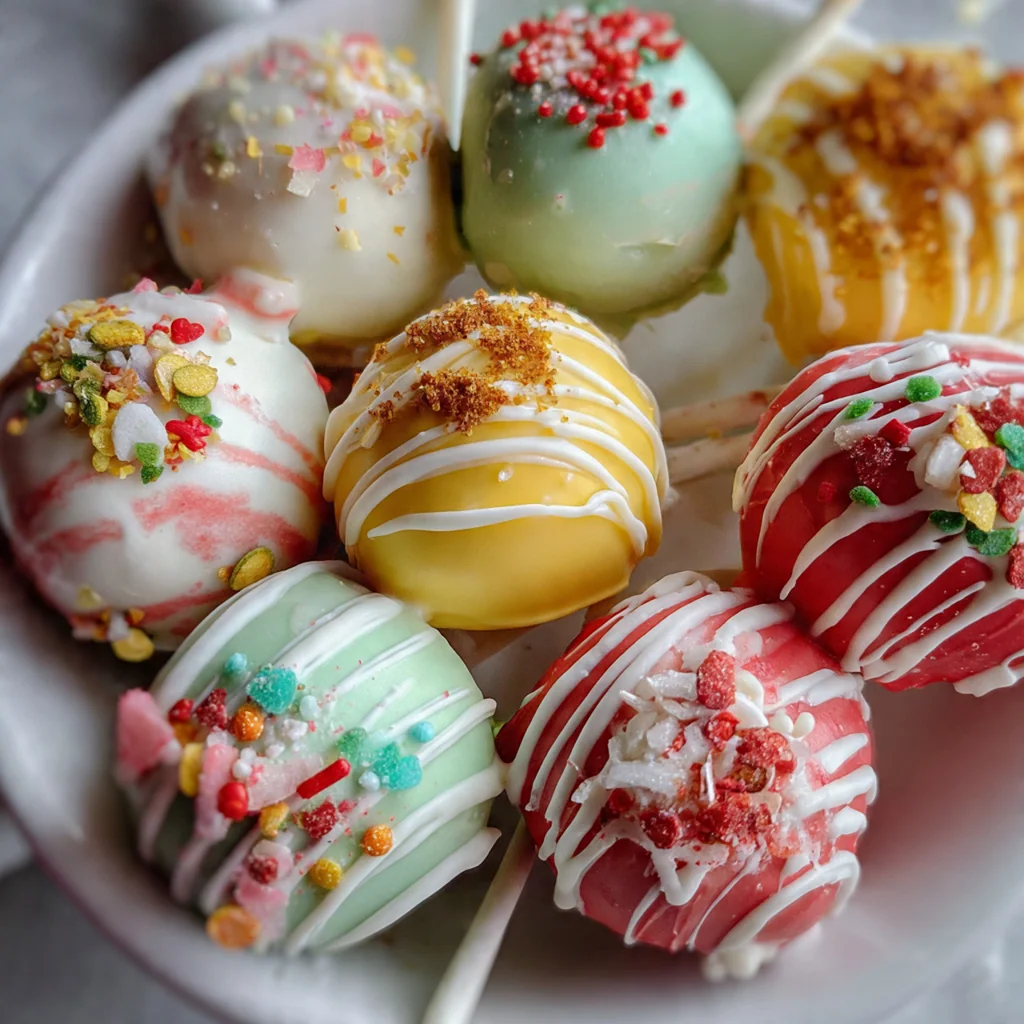
- White candy melts or almond bark: creates that smooth professional-looking coating that hardens perfectly for dipping and decorating.
- Lollipop sticks: the essential handle for your cake pops food-safe paper or plastic sticks work great.
- Festive sprinkles and sanding sugar: these optional toppings let you personalize each pop with holiday color and crunch.
- Crushed candy canes: another festive option that adds a pop of peppermint flavor and a pretty red and white finish.
How to Make It
Preheat and Prep Your Pan:
Start by heating your oven to 350°F and greasing your square baking pan. Lining it with parchment paper with an overhang is a game-changer it guarantees you can lift the whole cake out easily after it cools without any breakage.
Mix Your Dry Ingredients:
In a medium bowl, whisk together the flour, leaveners, salt, and all those warm spices. Doing this first ensures everything is evenly distributed so you don’t get a bite with just baking soda or a pocket of nutmeg.
Cream Butter and Sugar:
In a large bowl, use your electric mixer to beat the softened butter and sugar together for a few minutes until it’s light and fluffy. This step incorporates air which is what gives your cake a tender crumb instead of being dense.
Incorporate Wet Ingredients:
Beat in the eggs one at a time, letting each blend in fully before adding the next. Then mix in the vanilla and that wonderful orange zest the zest releases oils that perfume the whole batter with citrus.
Combine Wet and Dry:
With the mixer on low, add the dry ingredients and milk alternately, starting and ending with the dry mix. Mix just until combined overmixing at this stage can lead to a tough cake.
Bake and Cool Completely:
Pour the batter into your prepared pan, smooth the top, and bake until a toothpick comes out clean. Let the cake cool fully in the pan on a rack a completely cool cake crumbles perfectly and won’t melt the cream cheese later.
Crumble and Bind with Cream Cheese:
Once cool, crumble the cake into fine crumbs right in a large bowl. Add the softened cream cheese and mix it in until it comes together like a dough this is the fun part where it all starts to take shape.
Form and Chill the Balls:
Roll the mixture into evenly sized balls and place them on a parchment-lined sheet. Chilling them thoroughly in the fridge is non-negotiable it firms them up so they won’t fall apart when you dip them.
Melt Coating and Insert Sticks:
Melt your candy melts carefully in the microwave, stirring often to keep them smooth. Dip the tip of each stick into the melts and then push it into a chilled ball the melted candy acts like glue to secure the stick.
Dip and Decorate:
Now for the magic dip each pop into the melted coating, tap off the excess, and immediately add your sprinkles or sugars. You have to work quickly here before the coating sets to get those decorations to stick.
Set Upright to Harden:
Stand your freshly decorated cake pops upright in a styrofoam block or stand to let the coating harden. This keeps them perfectly round and gives you that polished professional look.
You Must Know
- A completely cool cake is crucial for clean crumbling
- Chilling the balls prevents them from sliding off the stick
- The candy coating sets fast so decorate immediately
- They’re surprisingly sturdy once the coating hardens
- I always make a double batch because they disappear fast
Storage Tips
You can store your finished Christmas cake pops right at room temperature in a single layer inside an airtight container they’ll stay perfect for about three days. For longer storage, pop the container in the fridge for up to a week, or freeze them for a whole month just let them come back to room temperature on the counter before serving so the coating isn’t damp from condensation. If you’re gifting them, a little cellophane bag tied with ribbon keeps them fresh and looks adorable.
Ingredient Substitutions
If you’re out of fresh oranges, a teaspoon of good orange extract can stand in for the zest in a pinch. For the candy coating, you can use white chocolate chips thinned with a bit of shortening though they might not set quite as firmly. To make these gluten-free, swap the all-purpose flour for your favorite one-to-one gluten-free blend it works beautifully. For a dairy-free version, use plant-based butter, milk, and cream cheese along with dairy-free white chocolate you’ll get the same festive look and fun.
Serving Suggestions
Arrange these pops on a festive platter as the centerpiece of your dessert table surrounded by other holiday classics like chewy gingerbread cookies and crunchy peppermint bark. They’re fantastic with a warm mug of hot chocolate or a cup of coffee the sweet coating and spiced cake are a perfect match. You can also bundle a few together with some curly ribbon to create the most thoughtful homemade gift for neighbors teachers or your office friends.
Cultural Context
While cake pops gained massive popularity in the early 2000s thanks to clever bakers and bloggers they’re a natural evolution of the American tradition of repurposing cake scraps into new treats like trifles or cake balls. The act of dipping and decorating individual sweet bites taps into the same festive playful spirit as decorating sugar cookies a hands-on holiday kitchen activity that’s as much about the process as the final product. These Christmas cake pops embody that modern DIY ethos taking simple familiar flavors and presenting them in a novel shareable way that’s perfect for today’s gatherings.
Pro Tips
- A slightly stale cake actually crumbles and binds better
- If your mix is too dry add a tiny splash of milk
- A teaspoon of shortening thins candy melts for perfect dipping
- Keep unused cake balls chilled while you work in batches
- My trick is to use a deep narrow mug for dipping
Frequently Asked Questions
Absolutely! While the blend of cinnamon, ginger, and nutmeg gives a classic holiday warmth, you can adjust to your taste or use a pre-mixed pumpkin pie spice for convenience. The key is using about 1.5 to 2 teaspoons total of your preferred warming spices to flavor the cake base.
Yes, they’re great for making ahead. Once fully assembled and the coating has set, store the cake pops in a single layer in an airtight container in the refrigerator for up to 5 days. They also freeze beautifully for up to a month; just thaw in the fridge overnight.
If you can’t find candy melts, you can use high-quality white chocolate chips thinned with a teaspoon of coconut oil. Gently melt them together, stirring constantly. Note that pure chocolate sets softer than candy coating, so handle with extra care and keep the finished pops chilled.
The cake is done when a toothpick inserted into the center comes out clean, which should take about 25 minutes in a preheated oven. It’s important not to overbake, as a slightly moist crumb helps the cake bind perfectly with the cream cheese for shaping the pops.
These sweet treats are a complete dessert on their own! For a festive American dessert spread, pair them with a pot of hot coffee, spiced apple cider, or rich hot chocolate. They also look beautiful alongside other holiday cookies and fudge on a dessert platter.