

This Rotisserie Chicken Sliders recipe is my secret weapon for turning a busy week into a fantastic meal without any stress. It transforms a simple store-bought rotisserie chicken into a warm, cheesy, and irresistible American classic that everyone adores. I love how it brings people together, whether it’s for a casual family dinner or a last-minute game day gathering. The magic is in the creamy, herbed chicken salad and that quick bake that toasts the buns and melts the cheese into gooey perfection.
Why You'll Love This Recipe
- You start with a flavor-packed rotisserie chicken for instant success
- They go from your fridge to the table in about 25 minutes flat
- Perfect for feeding a crowd without any fuss
- That baked finish makes the buns golden and the cheese melty
- I make these for every potluck and they disappear first
Ingredients You’ll Need
- Rotisserie chicken: using a pre-cooked bird is the ultimate time-saver and gives you deep, savory flavor without any work, just be sure to shred it finely for the best texture.
- Mayonnaise: creates the creamy, rich base that binds everything together, a good quality mayo makes a noticeable difference here.
- Plain Greek yogurt: adds a welcome tang and lightens up the filling a bit while keeping it super creamy.
- Dijon mustard: brings a sharp, complex note that cuts through the richness and wakes up all the other flavors.
- Celery: provides that essential fresh crunch and a hint of vegetal sweetness, finely dicing it ensures it blends in perfectly.
- Red onion: minced red onion gives a pop of color and a mild, sweet bite that isn’t too overpowering.
- Fresh dill: the herby, almost lemony freshness of dill is what makes this chicken salad sing, don’t skip it.
- Fresh lemon juice: a squeeze of bright acid balances the creamy components and keeps the whole mix from feeling heavy.
- Garlic powder: delivers a warm, savory depth that permeates every bite without the sharpness of raw garlic.
- Black pepper and salt: these are your flavor enhancers, seasoning the mixture properly is key to a great slider.
- Slider buns: soft, slightly sweet buns like Hawaiian or brioche hold up to the filling and get wonderfully toasted.
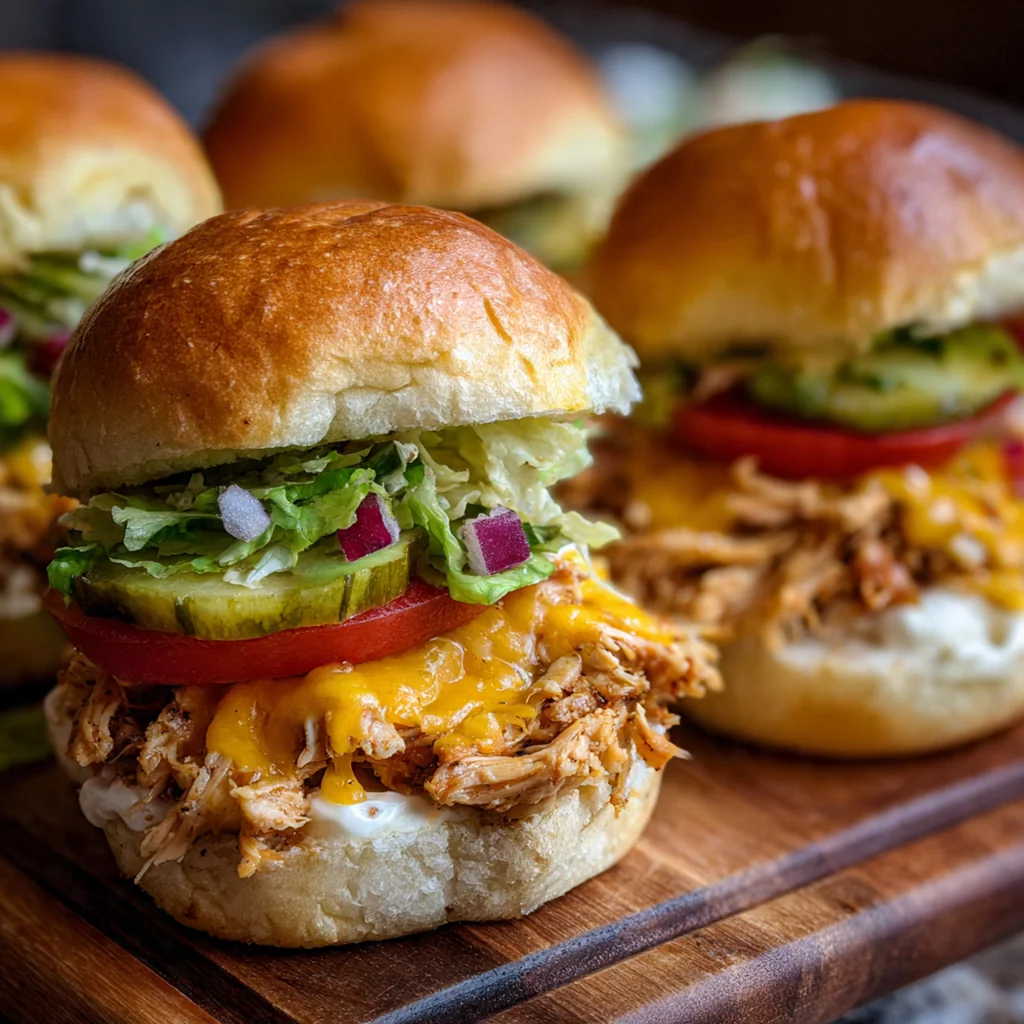
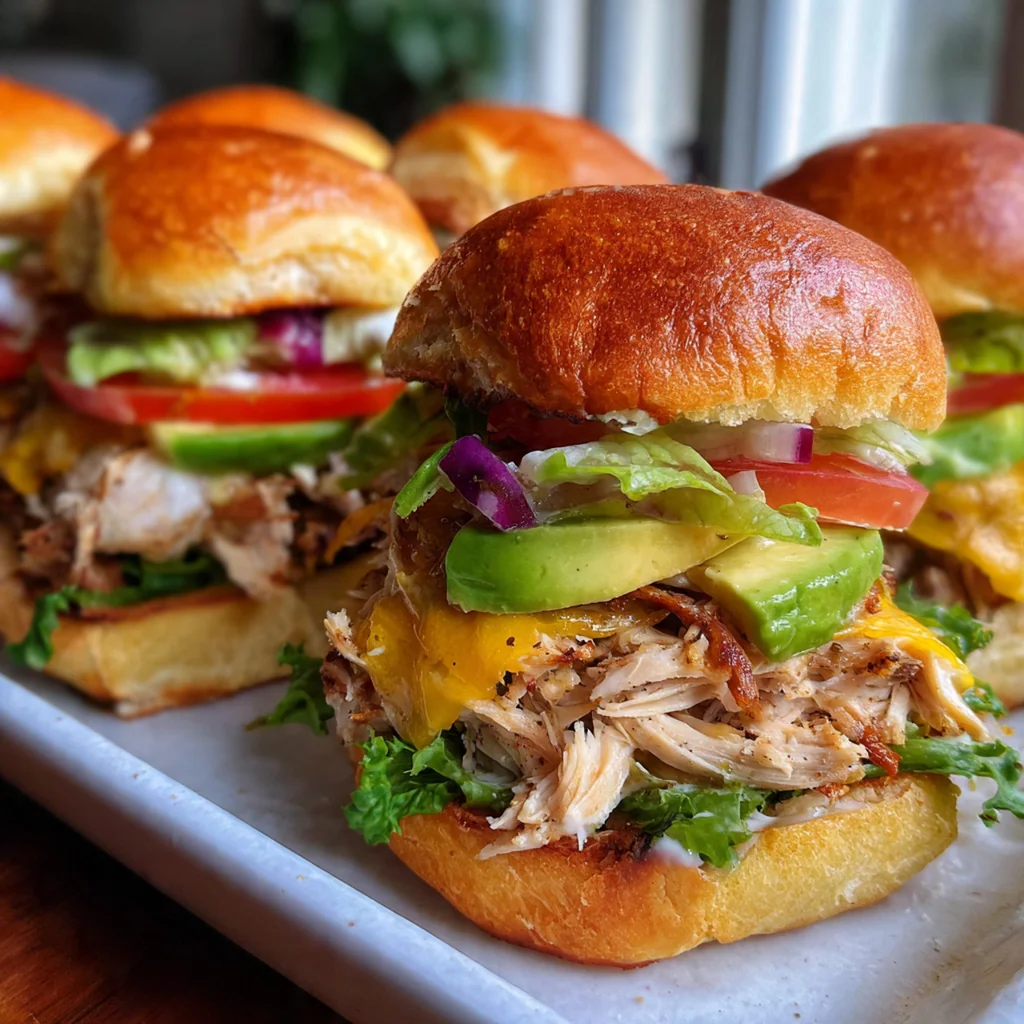
- Cheddar cheese: melts into a gooey, salty blanket that brings everything together, cutting the slices to fit is part of the charm.
- Unsalted butter: brushing melted butter on top gives the buns that gorgeous golden-brown, buttery finish we all crave.
How to Make It
Preheat and Prep Your Pan:
Start by getting your oven ready at 350°F and line a baking sheet for easy cleanup. This little step means you won’t be scrubbing later, and it helps the sliders release without sticking.
Shred Your Rotisserie Chicken:
Take all the meat off the bone, discarding the skin, and shred it into bite-sized pieces with your fingers or two forks. You want about four cups of chicken for the perfect filling to bun ratio.
Mix the Creamy Chicken Salad:
In a big bowl, combine the shredded chicken with the mayo, yogurt, mustard, celery, onion, dill, lemon juice, and all the seasonings. Stir it until every piece of chicken is coated in that herby, creamy goodness.
Assemble the Slider Base:
If your buns are connected, slice the whole sheet in half horizontally with a serrated knife. Place the bottom halves on your prepared pan and evenly spoon the chicken mixture over them, spreading it right to the edges.
Add Cheese and Tops:
Lay a half slice of cheddar over each mound of chicken, then cap it all with the top bun halves. The cheese layer will melt right into the chicken as it bakes.
Brush with Butter and Bake:
Use a pastry brush or a spoon to lightly coat the top of the buns with melted butter. This is what gives you that beautiful, golden color and a hint of richness. Bake for 10 to 12 minutes until the cheese is bubbly and the edges are toasty.
Rest and Add Fresh Toppings:
Let the whole pan cool for just a couple of minutes so everything sets up and you don’t burn your mouth. Then, if you’re using them, tuck in some crisp lettuce, tomato slices, or pickles for a fresh contrast.
Serve Immediately:
Slide a spatula underneath to lift them out and serve these rotisserie chicken sliders warm. That first bite of warm, creamy chicken and melted cheese on a soft bun is pure comfort.
You Must Know
- Let the chicken mix sit for 15 minutes before assembling
- Use a serrated knife to cut connected buns cleanly
- The baking step is non-negotiable for texture
- You can assemble them a day ahead
- My family fights over the corner sliders
Storage Tips
Store any leftover assembled rotisserie chicken sliders in an airtight container in the fridge, and they’ll keep well for up to three days. I reheat mine in a 300°F oven for about 10 minutes to get the buns crisp again and the filling warmed through – the microwave will make them soggy. If you have extra chicken salad, you can keep that separately in the fridge for up to four days, which is perfect for a quick lunch on crackers or in a wrap.
Ingredient Substitutions
If you don’t have Greek yogurt, sour cream works beautifully for a similar tang, or just use all mayonnaise. Swap the cheddar for any melty cheese you love – Swiss, pepper jack, or provolone are all fantastic. No fresh dill? Try a teaspoon of dried dill, or use fresh parsley or chives for a different herbal note. For the buns, any soft dinner rolls or even split English muffins will work in a pinch, just adjust the baking time if they’re thicker. You can even use canned chicken or leftover turkey if that’s what you have, though rotisserie chicken really is the star.
Serving Suggestions
I love piling these rotisserie chicken sliders on a big platter with a bowl of classic potato chips and a tangy vinegar-based coleslaw for the perfect crunch contrast. They’re also fantastic with a simple green salad dressed with a lemony vinaigrette or alongside some crispy sweet potato fries for a more substantial meal. For a fun game day spread, put out different pickles and hot sauces so everyone can customize their own slider, and don’t forget napkins – things get deliciously messy.
Cultural Context
The beauty of these rotisserie chicken sliders is their pure, adaptable American spirit, taking the convenience of a supermarket staple and turning it into a shareable feast. You can trace the idea back to classic chicken salad sandwiches and the communal appeal of party sliders, combining them into something made for modern, busy lives. It’s a recipe built on practicality and crowd-pleasing flavor, perfect for everything from a weeknight kitchen table to a backyard gathering where easy, hands-on food is the real guest of honor. This is the kind of dish that feels both nostalgic and utterly of-the-moment because it simply works.

Pro Tips
- Add a dash of hot sauce to the chicken mix for a kick
- Letting the filling rest melds the flavors beautifully
- Assemble ahead and bake when guests arrive
- Swap the cheese to match your mood
- I always make a double batch
Frequently Asked Questions
Soft, slightly sweet slider buns like Hawaiian rolls or brioche are perfect for Rotisserie Chicken Sliders. They hold the creamy chicken salad well and get deliciously soft and golden when baked. Avoid crusty rolls, as you want that tender, pull-apart texture.
Absolutely! You can prepare the creamy chicken salad mixture up to two days in advance and store it covered in the fridge. When ready to eat, assemble the sliders and bake. This makes them an excellent make-ahead option for parties or busy nights.
If you don’t have Greek yogurt, you can use an equal amount of sour cream or additional mayonnaise. Sour cream will add a similar tang, while all mayo will make the filling richer. For a lighter option, try low-fat mayonnaise.
Your Rotisserie Chicken Sliders are ready when the buns are golden brown on top, the cheese is fully melted, and the creamy chicken filling is hot and bubbly around the edges. This usually takes about 8-10 minutes in a preheated 350°F oven.
For a classic American meal, serve your Rotisserie Chicken Sliders with crispy potato chips, a simple green salad, coleslaw, or pickles. For heartier sides, consider sweet potato fries, baked beans, or a classic potato salad.